Offline AI File Renaming with Ollama
Offline AI mode lets Zush process supported file analysis through a local Ollama model instead of a cloud AI provider. It is useful when privacy or offline work matters more than cloud speed.
Use this guide when you want to install Ollama, download a local vision model, connect Zush to it, and test Offline AI mode before using it on real files.
What Offline AI mode means
Section titled “What Offline AI mode means”When Offline AI mode is enabled, supported file analysis runs through your local Ollama server. Zush does not send analysis content to Zush cloud or third-party AI providers in this mode.
You still control:
- which Ollama model is installed
- where Ollama stores local models
- when the Ollama app or server is running
- whether Zush uses Offline AI, BYOK, or managed cloud processing
Requirements
Section titled “Requirements”- Zush PRO
- Mac or Windows
- Ollama installed locally
- at least one installed Ollama model; use a vision-capable model for images and file previews
- enough memory and disk space for the model you choose
Zush works best with vision-capable models because many rename jobs involve images, screenshots, PDFs, scans, video frames, or document previews.
Set up Ollama for Zush
Section titled “Set up Ollama for Zush”-
Download Ollama from the official Ollama download page.
-
Install Ollama and open it so the local server starts.
-
Download a vision-capable model. A compact first choice is:
Terminal window ollama pull qwen2.5vl:3b -
If Ollama is not already running, start its server from Terminal:
Terminal window ollama serve -
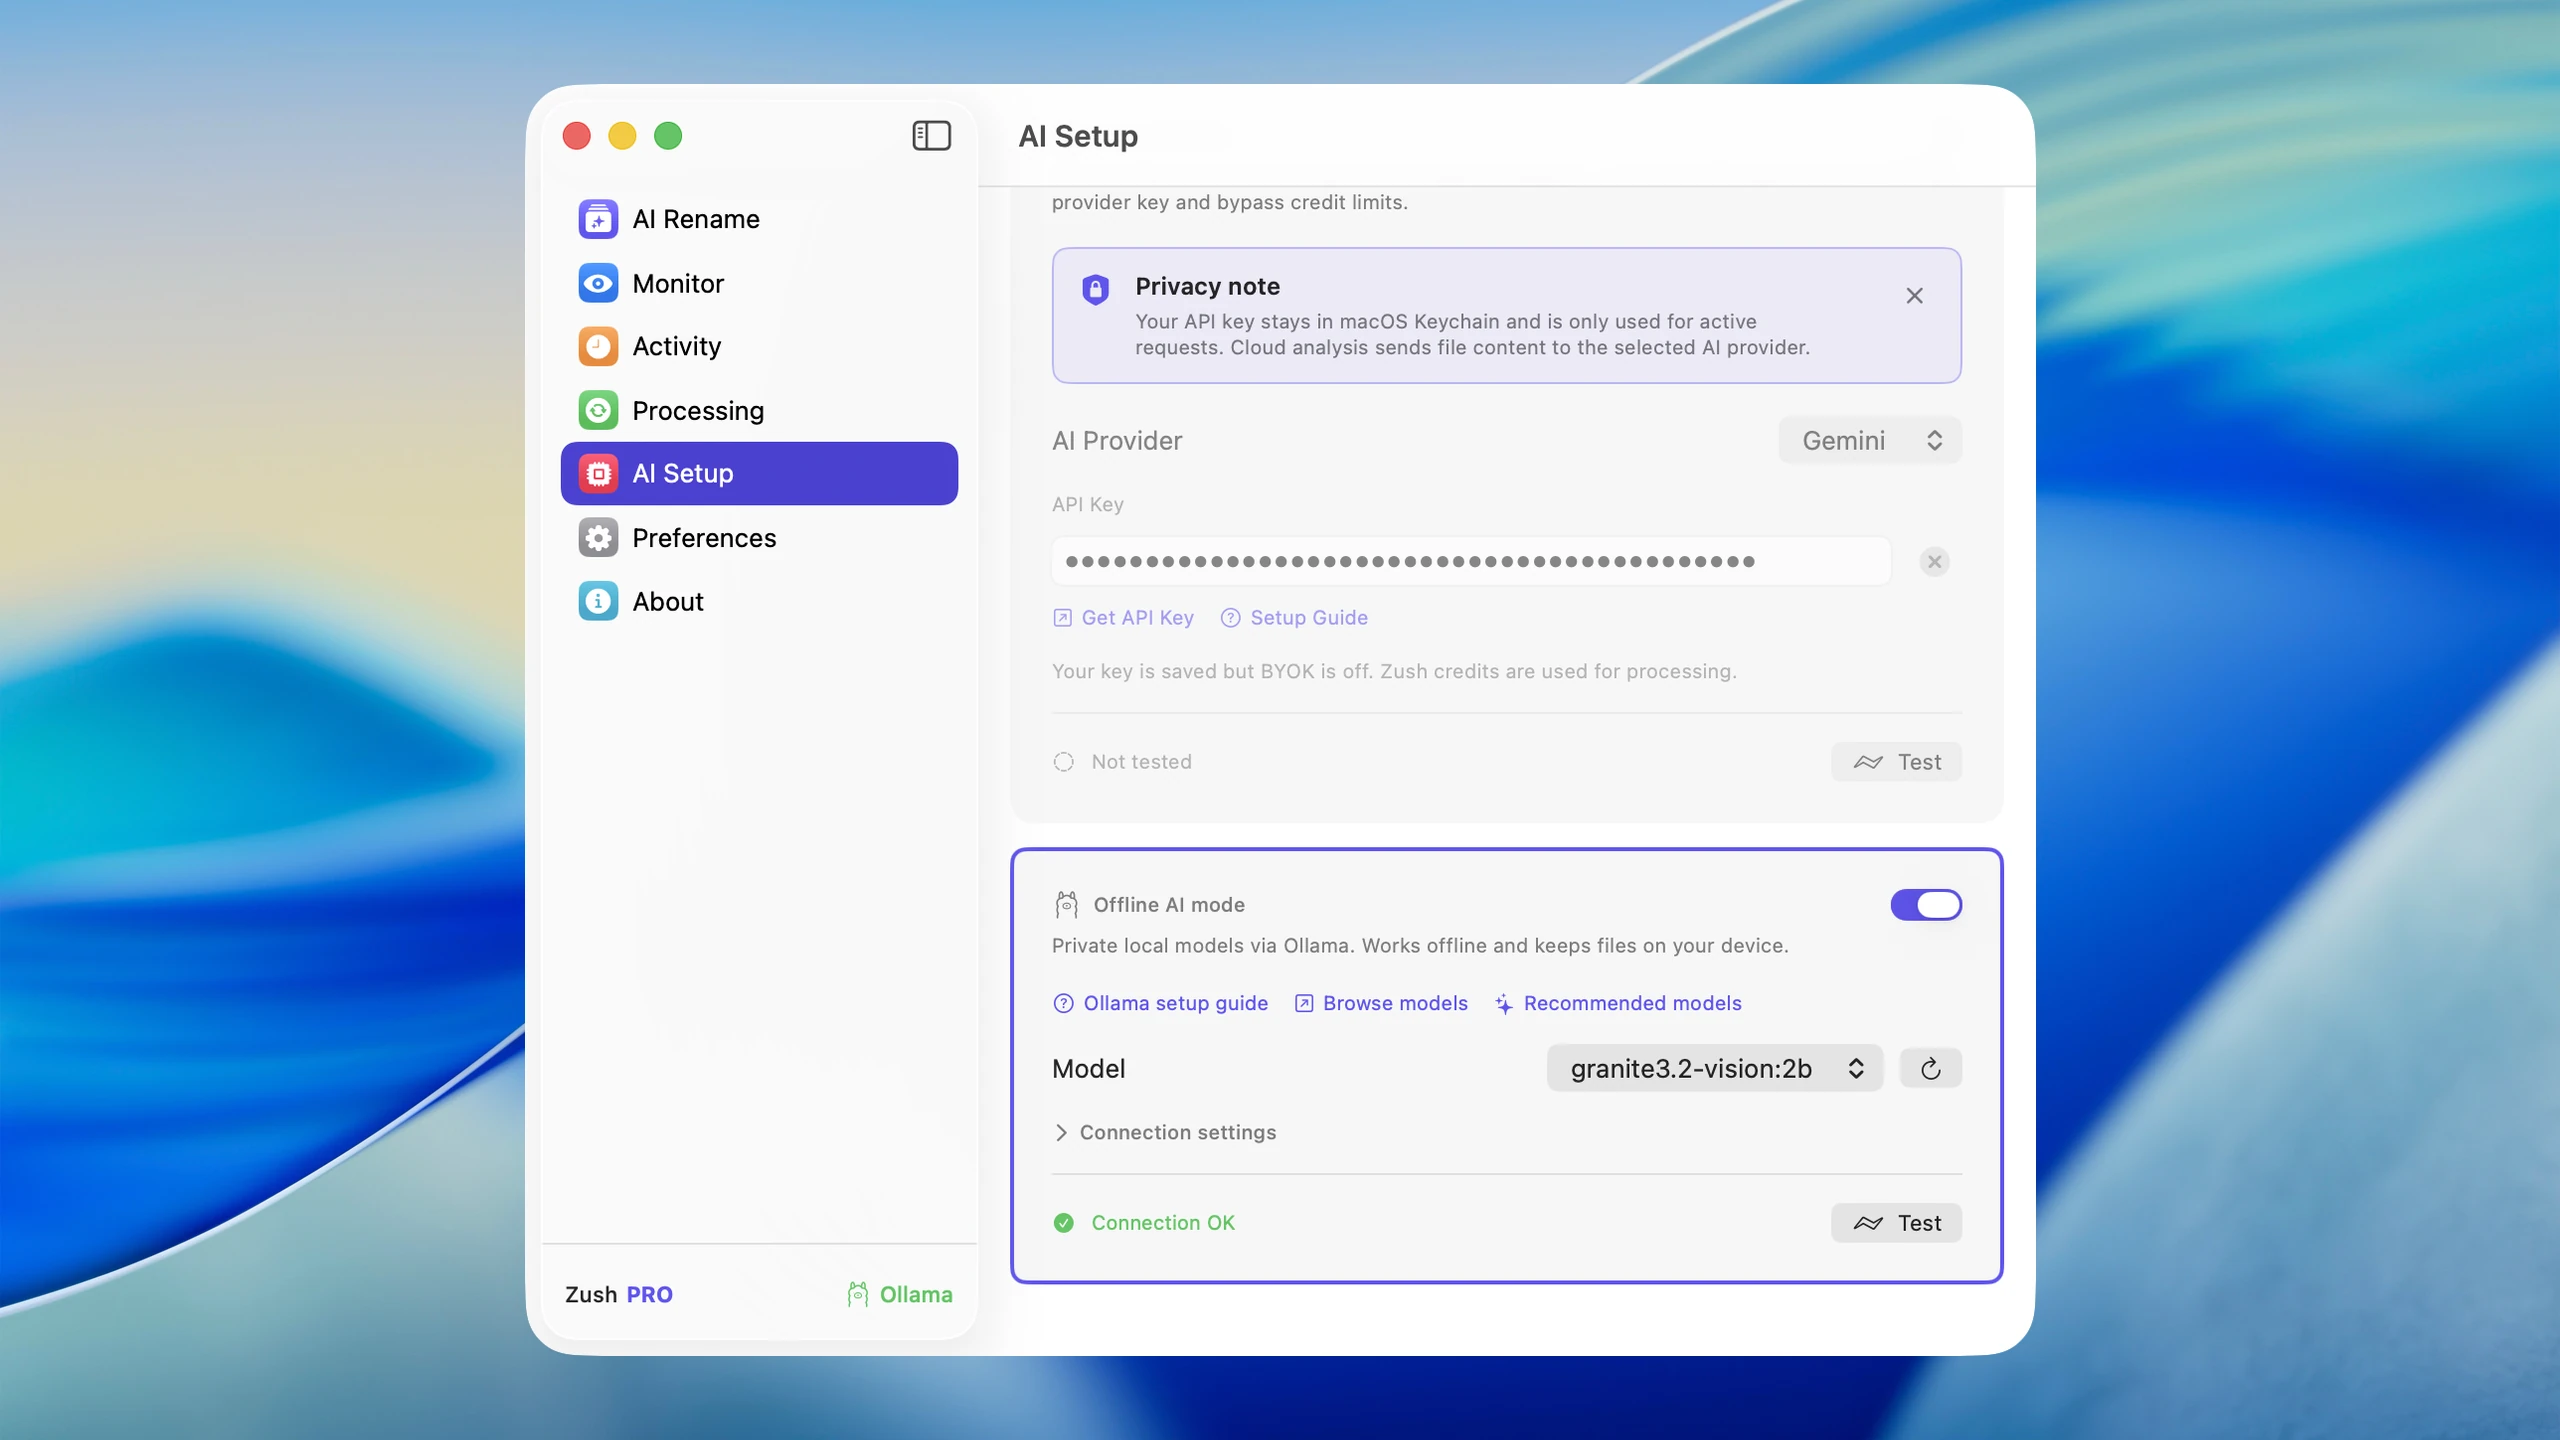
Open Zush and select BYOK/Offline in the sidebar.
-
Wait for Zush to detect Ollama. If needed, click refresh next to the model list.
-
Select the installed local model.
-
Click Test to verify the current host and model.
-
Turn on Offline AI mode. Zush checks that Ollama is reachable and that the selected model is installed before enabling it.
-
Run a small batch before using Offline AI on important folders.
Recommended models
Section titled “Recommended models”These vision-capable models are practical starting points for Zush:
| Model | Best for | Command | Notes |
|---|---|---|---|
qwen2.5vl:3b | General visual analysis | ollama pull qwen2.5vl:3b | Compact Qwen vision model for screenshots and images |
gemma3:4b | General and multilingual vision | ollama pull gemma3:4b | Vision-capable 4B Gemma 3 model |
granite3.2-vision:2b | Visual documents | ollama pull granite3.2-vision:2b | Compact model designed for documents, tables, charts, and diagrams |
You can also choose another vision-capable model from the Ollama model catalog. Model availability and quality change over time, so test with your own files before automating a large workflow.
Verify Ollama from Terminal
Section titled “Verify Ollama from Terminal”Use Terminal to confirm Ollama has a model installed:
ollama listIf the list is empty, pull a model first:
ollama pull qwen2.5vl:3bIf the Zush connection test fails, make sure Ollama is running and that the local host is:
http://127.0.0.1:11434Test before monitoring a folder
Section titled “Test before monitoring a folder”Start with a small batch rename and compare the suggested names with Cloud AI or BYOK if accuracy matters. Local models can be excellent for private workflows, but smaller models may be slower or less precise on complex PDFs, mixed media, or long documents.
Once the results look reliable, assign the workflow to folder monitoring or save the setup as a Template.
Troubleshooting
Section titled “Troubleshooting”| Problem | What to check |
|---|---|
| Zush does not see models | Run ollama list. If the list is empty, pull a model, then refresh the model list in Zush |
| Connection test fails | Make sure Ollama is running and reachable at http://127.0.0.1:11434 |
| Processing is too slow | Choose a smaller installed model, close memory-heavy apps, or switch to Cloud AI for large batches |
| Results are weak | Try gemma3:4b or another vision-capable model and test with representative files |
Limits
Section titled “Limits”Offline AI support depends on file type, model capability, and local hardware. For the broadest mixed-folder accuracy across images, PDFs, audio, video, documents, and design files, compare Offline AI results with managed Cloud AI or BYOK.