
LM Studio Setup for Local AI
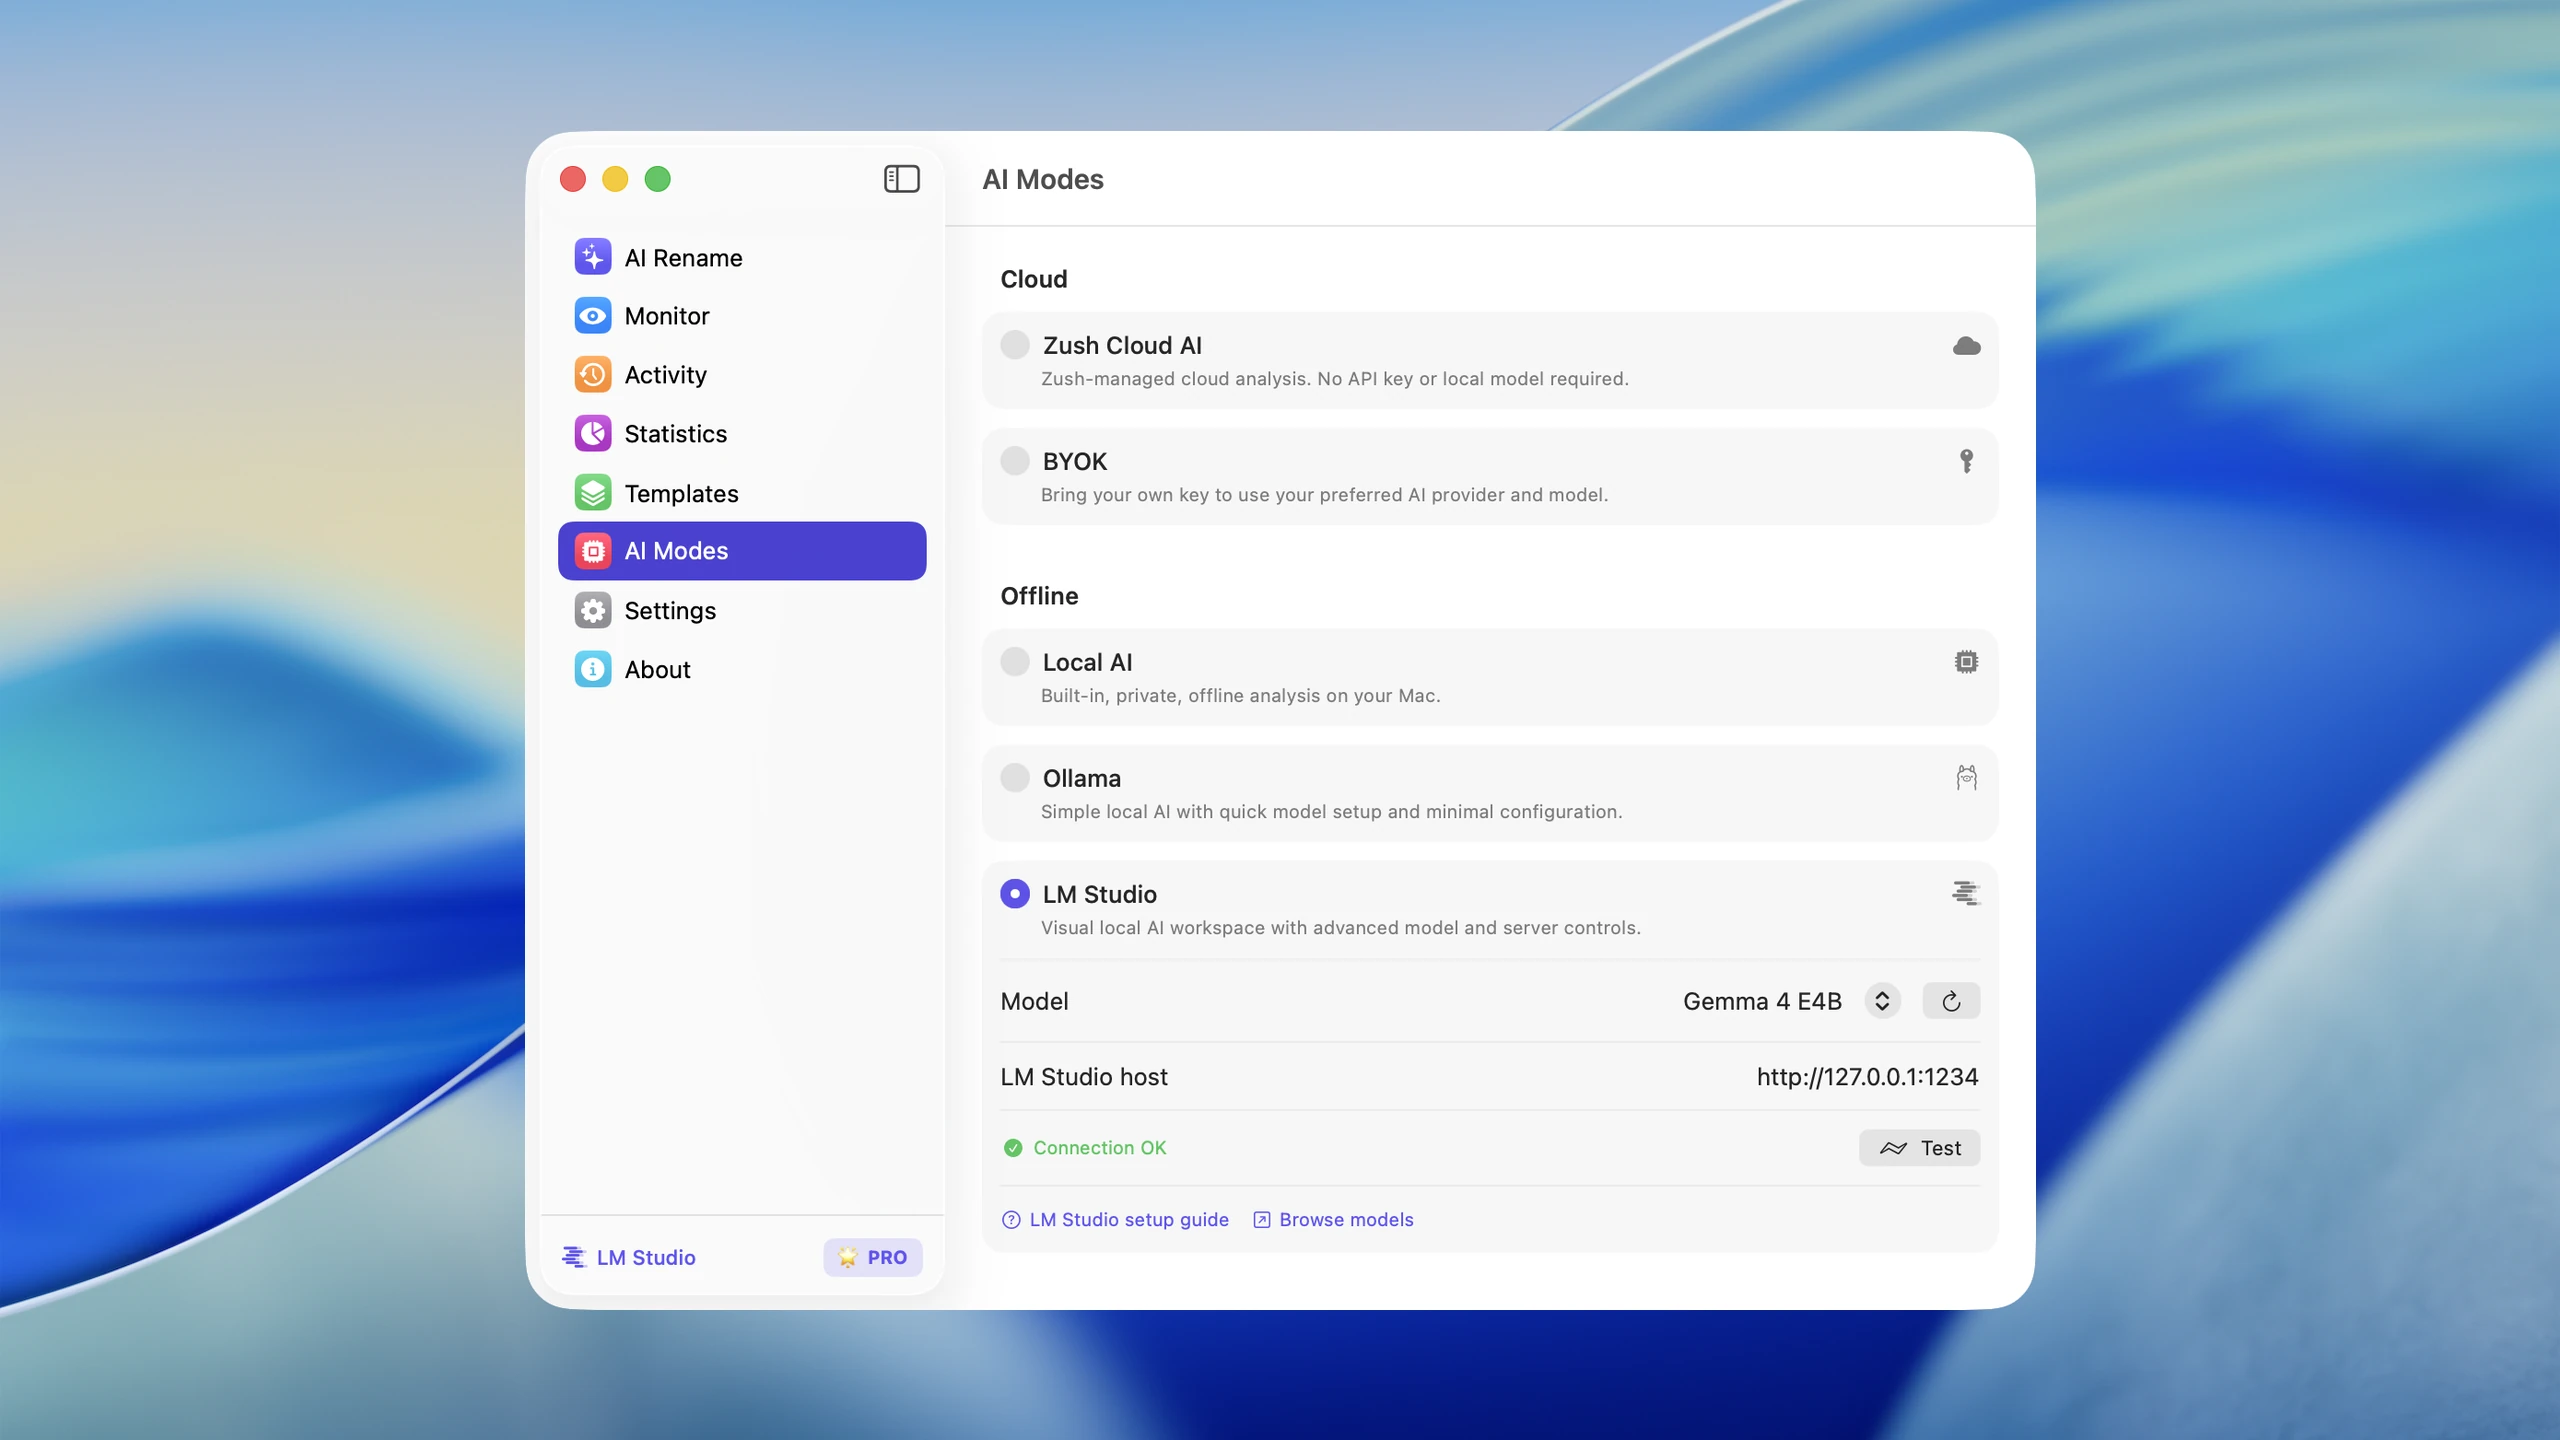
LM Studio mode connects Zush to the local OpenAI-compatible server managed by LM Studio. Use it when you want to choose your own vision-capable model and control model loading in LM Studio.
Requirements
Section titled “Requirements”- the latest Zush version for Mac or Windows
- LM Studio installed
- a downloaded vision-capable model
- the LM Studio local server running
Set up LM Studio
Section titled “Set up LM Studio”- Install and open LM Studio.
- Download a vision-capable model in LM Studio.
- Open Developer in LM Studio and turn on Start Server.
- Open Zush Settings and select AI Modes.
- Select LM Studio.
- Confirm the host. The default local endpoint is
http://127.0.0.1:1234. - Refresh the model list and select the installed vision-capable model.
- Run Test and wait for a successful connection.
- Test a small batch in AI Rename before using folder monitoring.
Troubleshooting
Section titled “Troubleshooting”| Problem | What to check |
|---|---|
| LM Studio is not detected | Install and open LM Studio, then return to AI Modes |
| Server is not running | In LM Studio, open Developer and enable Start Server |
| No models appear | Download and load a vision-capable model, then refresh in Zush |
| Connection test fails | Confirm the host is http://127.0.0.1:1234 unless you intentionally changed it |
| Model is too slow | Load a smaller vision model or compare the Ollama setup |
Privacy
Section titled “Privacy”With the default loopback endpoint, supported analysis runs through LM Studio on your Mac or Windows PC. Zush does not silently switch to cloud analysis while LM Studio mode is selected.