How to Sort Files into Folders Automatically on Windows 11 with AI

Jump to section
Quick answer: Windows 11 has no built-in way to sort files into folders by what they contain. File Explorer can group a view by type or date, and Storage Sense only deletes. To actually move files into folders by content, use Zush for Windows: turn on Sort, describe the folders in plain language, review the plan, and apply. The same setup can then sort every new download automatically.
This guide works on Windows 11 and Windows 10.
What Windows can and cannot do on its own
| Tool | What it does | What it cannot do |
|---|---|---|
| File Explorer Group by | Groups the current view by type, date, or size | Move anything; the grouping disappears in another view |
| Storage Sense | Deletes old downloads and temporary files | Decide where a file belongs |
| PowerShell script | Moves files by extension or name pattern | Read an invoice, photo, or video to find the company, month, or subject |
| Zush | Reads each file, renames it, moves it into a folder that matches your rule | Replace a document-management system |
If your files follow exact name patterns, a rule tool such as File Juggler or DropIt is enough. If they are called document (3).pdf, IMG_2041.jpg, and Scan0001.pdf, a rule has nothing to match. That is where content-based sorting helps.
Step 1: Install Zush
Install Zush from the Microsoft Store. The first 50 AI renames are free, which is enough to test sorting on a real folder. Zush Cloud AI works right away; you can switch to your own API key or a local model in Settings later.
Step 2: Choose the destination folder
- Open the AI Rename tab.
- Choose a Template for the filenames. Smart Rename is a good start.
- Below the Naming Blocks, open the Destination folder control. Keep Original location to create folders next to the files, or click Choose… to pick a root such as
D:\SortedorDocuments\Finance.
Sorted folders are always created inside this destination. If you choose a destination without turning on sorting, renamed files simply move there.
Step 3: Turn on Sort and write your folder rules
- Click Sort to enable folder sorting for this batch.
- Open Folder rules.
- Leave the field empty (or click Use Default) for Auto, which groups files by content into a few broad folders. Or describe the grouping in your own words:
Group invoices by company and receipts by month. Name month folders YYYY-MM.
The field accepts up to 2,000 characters. Write it the way you would brief an assistant: what goes together, and how the folders should be named. You need no conditions, wildcards, or scripts. More examples are in 30 folder sorting prompts.
- Keep Reuse existing folders on if the destination already has folders you want to fill. Zush will pick a matching folder when one fits and create a new one only when nothing does.
Step 4: Add files and review the plan
Drag files or a folder into Zush. You will see Analyzing files…, then Grouping files… while Zush plans the folders.
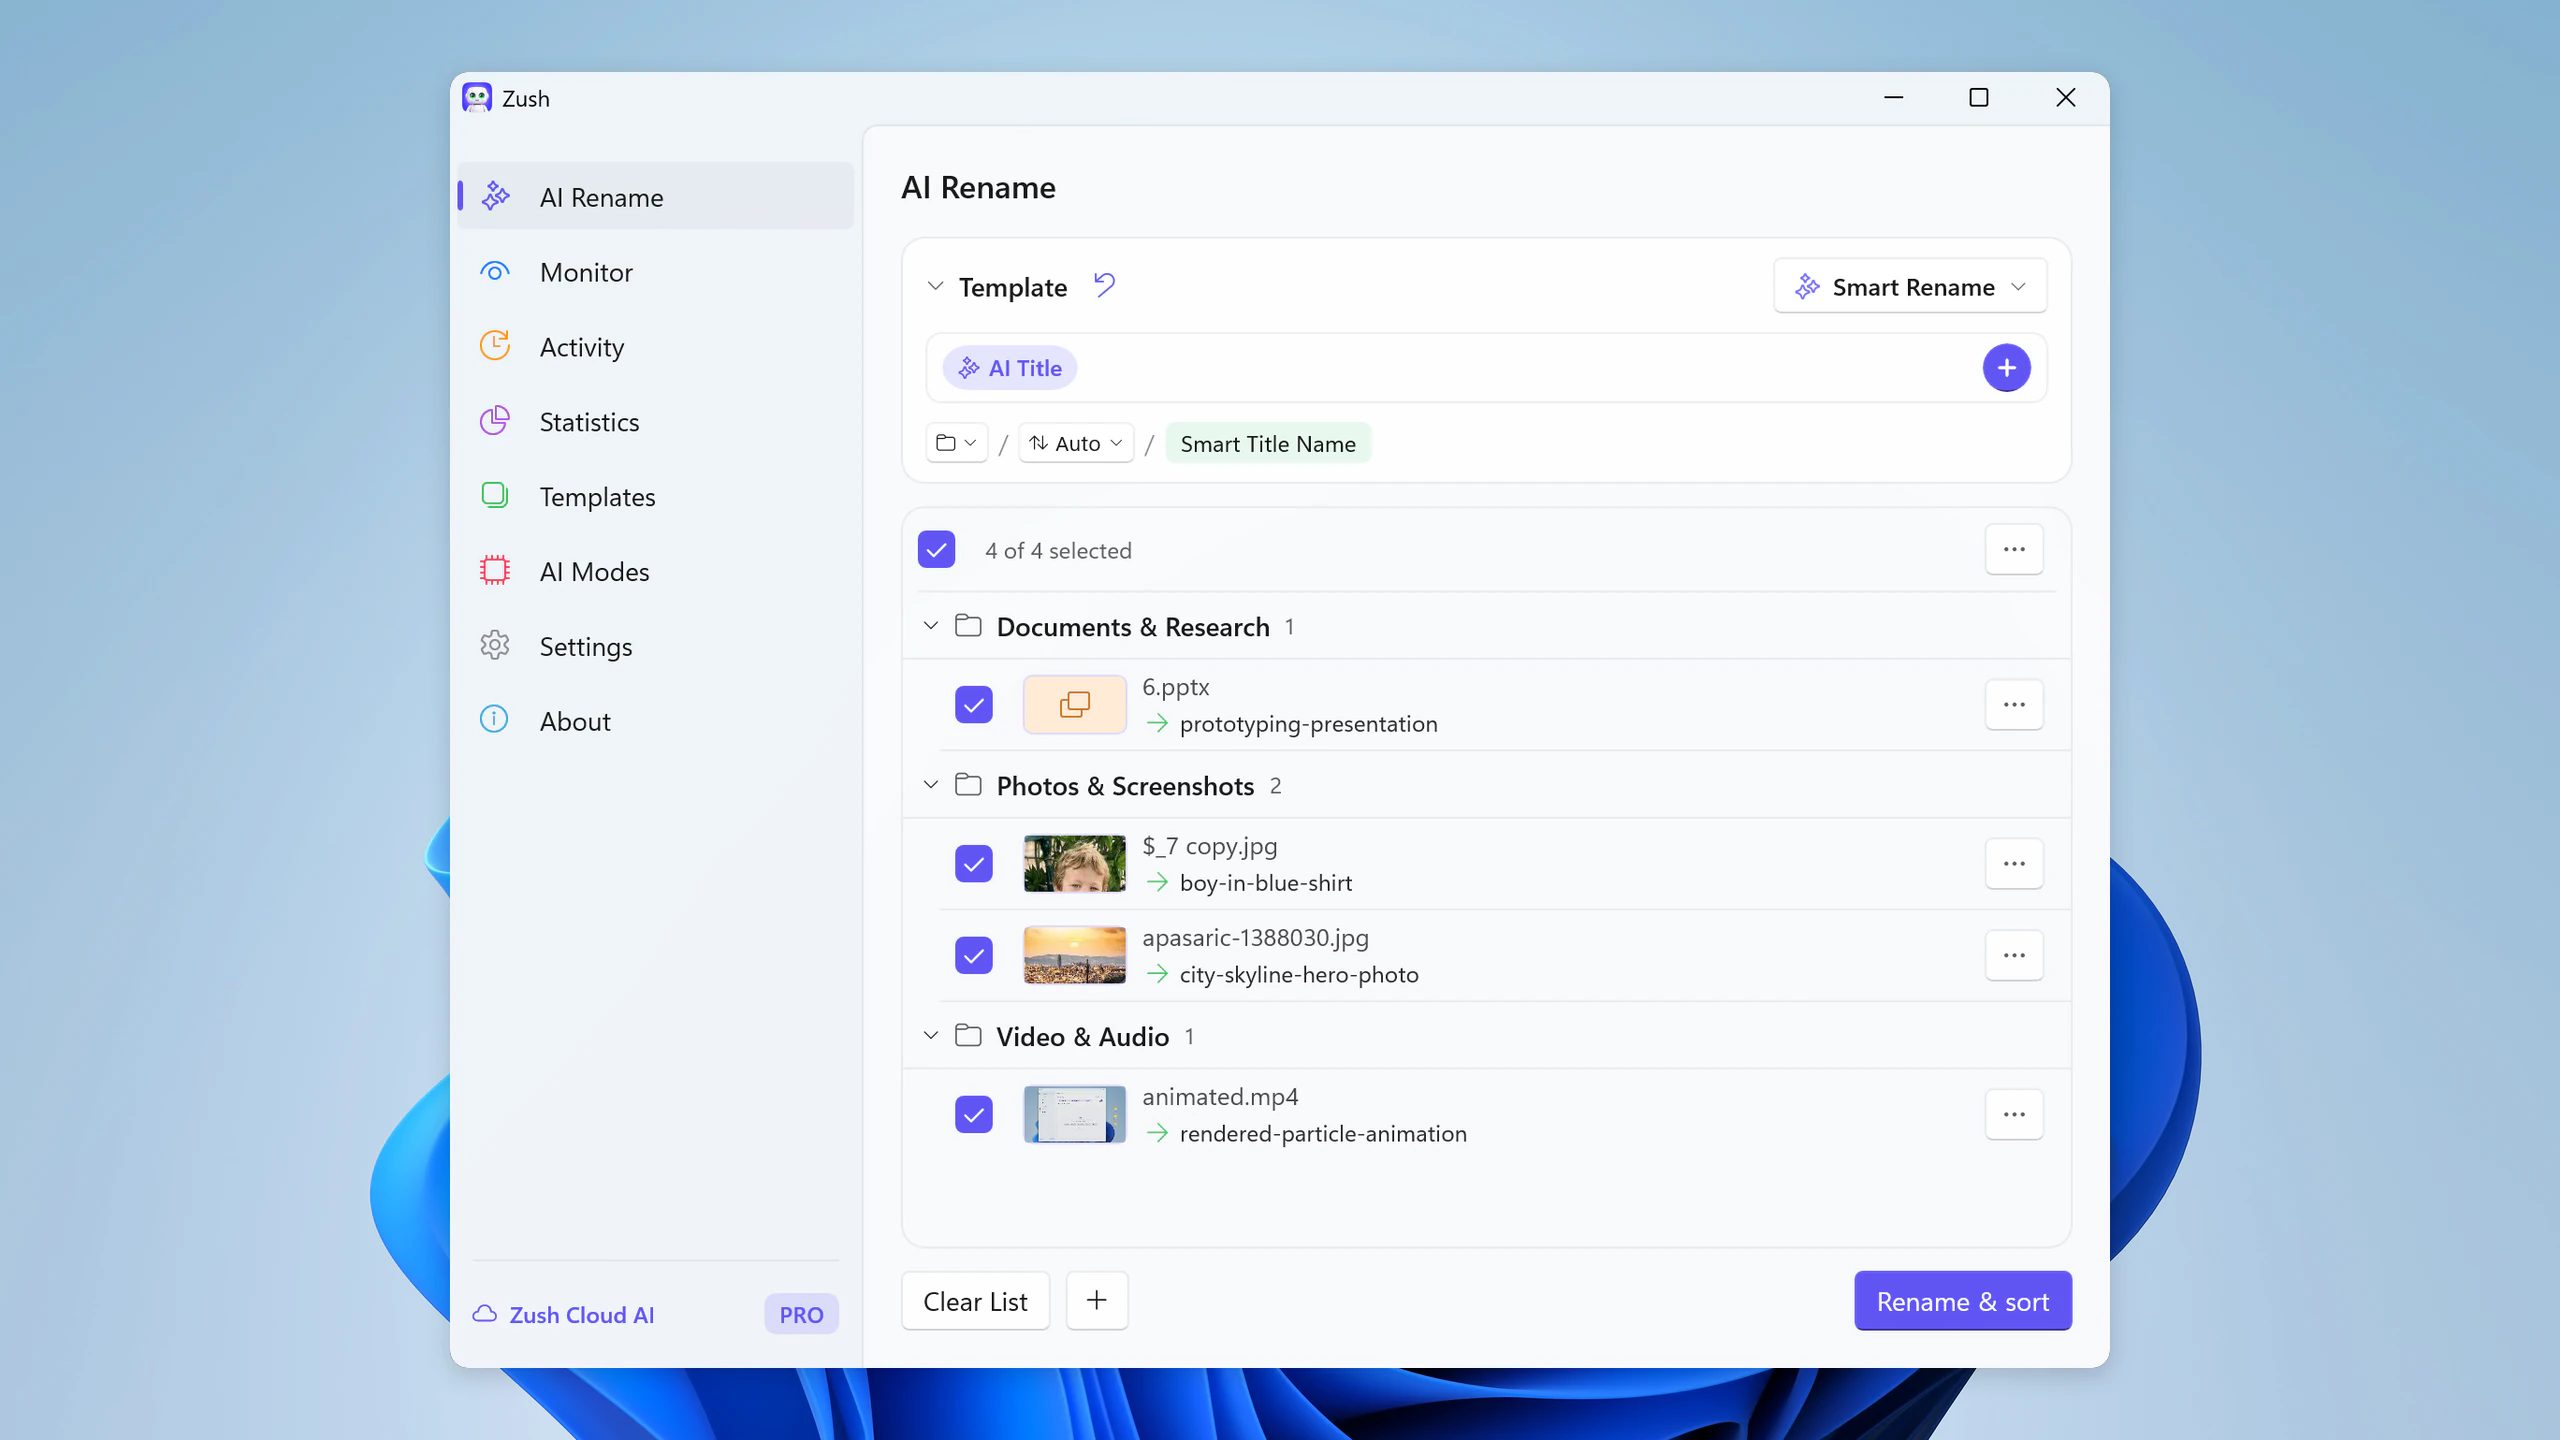
The review shows each proposed folder with its files and their new names:
- Click Rename folder to change a folder name.
- Move a file to another group if it landed in the wrong one.
- Files that fit no folder appear under Ungrouped and are renamed without being sorted.
- Collapse or expand folders to check a large batch quickly.
When the names and folders look right, click Rename & sort. Every batch is saved in Rename History.

Step 5: Sort new files automatically with Monitor
Once a manual batch looks right, make it automatic:
- Open Templates, choose the Template you used, and set Destination folder, Folder sorting, Reuse existing folders, and Folder rules there. Save it.
- Open Monitor and add a folder such as
Downloadsor your scanner’s output folder. - Assign the sorting Template to that folder.
New files that arrive directly in the monitored folder are renamed and sorted in the background. Monitor remembers the folders it created, so next month’s invoices from the same supplier land in the same place. Check results in Activity. Monitor does not reorganize files that were already there; run a manual batch for those.
Example setups
| Folder | Destination | Folder rules |
|---|---|---|
| Downloads | Documents\Sorted | Group files by type of document: Invoices, Receipts, Contracts, Manuals, Installers, Images. |
| Scanner output | Documents\Paperwork | Group scans by the organization that sent them. Use the organization name for folders. |
| Freelance invoices | D:\Finance\2026 | Group invoices by client and use the client company name for folders. |
| Phone photos | Pictures\Sorted | Group photos by subject, such as People, Pets, Food, Travel, and Documents. |
| Screen recordings | Videos\Recordings | Group videos by the app or website shown on screen. |
Tips for reliable sorting
- Start with 20 files. Test on copies before pointing Zush at a folder you depend on.
- Sort by something visible in the file. Company names, dates, subjects, and document types work well. “Important vs not important” does not.
- Prefer few, broad folders. “By month” or “by client” produces clean results. Very narrow rules create many one-file folders.
- Keep sorting off where paths matter. Project folders, code, and files that other apps link to should stay where they are. Rename them in place instead.
- Private files can stay on your PC. Choose LM Studio or Ollama in Settings and both analysis and folder planning run locally.
Move to a Mac later? Take your rules with you
Templates, including Folder rules, can be exported from Zush for Windows and imported into Zush for Mac, and the other way around. The destination path is local, so choose it again on the new computer. See how to import and export Templates and the Mac version of this guide.
FAQ
How do I automatically sort files into folders in Windows 11?
Windows 11 has no built-in content-based sorting. Install Zush, turn on Sort in AI Rename, describe the folders in Folder rules, and apply the batch after review. To sort new files automatically, save the settings in a Template and assign it to a monitored folder such as Downloads.
Can I sort files by content instead of file type on Windows?
Yes. Zush reads the text of PDFs and scans, the content of photos and screenshots, video frames, and audio, then groups files according to your rule, such as by company, month, or subject. Sorting by extension only needs File Explorer or a simple script.
How do I sort my Downloads folder automatically on Windows?
Add Downloads to Zush Monitor and assign a Template with folder sorting turned on, a destination folder, and Folder rules such as “Group files by document type.” Each new download is renamed and moved into the right folder as it arrives.
Is Zush folder sorting available on Windows 10?
Yes. Zush for Windows runs on Windows 10 and Windows 11 and has the same folder sorting, destination folder, and folder rules settings as the Mac app.
Can I undo AI folder sorting?
Yes. Nothing moves until you apply the plan, and every sorted file is recorded in Rename History. Undo moves the file back to its original folder and restores its original name. Test on copies first, and keep sorting off for folders that other apps reference by path.


